The Z490 Mini-ITX Showdown: GIGABYTE's Z490I Aorus Ultra and MSI's MEG Z490I Unify Reviewed
by Gavin Bonshor on August 4, 2020 10:30 AM ESTGIGABYTE Z490I Aorus Ultra BIOS
The firmware on the GIGABYTE Z490I Aorus Ultra uses a black and orange contrasting theme, with white text and dark orange highlights. The firmware itself has two primary modes, Easy mode and the advanced mode which users can access by pressing the F2 key.
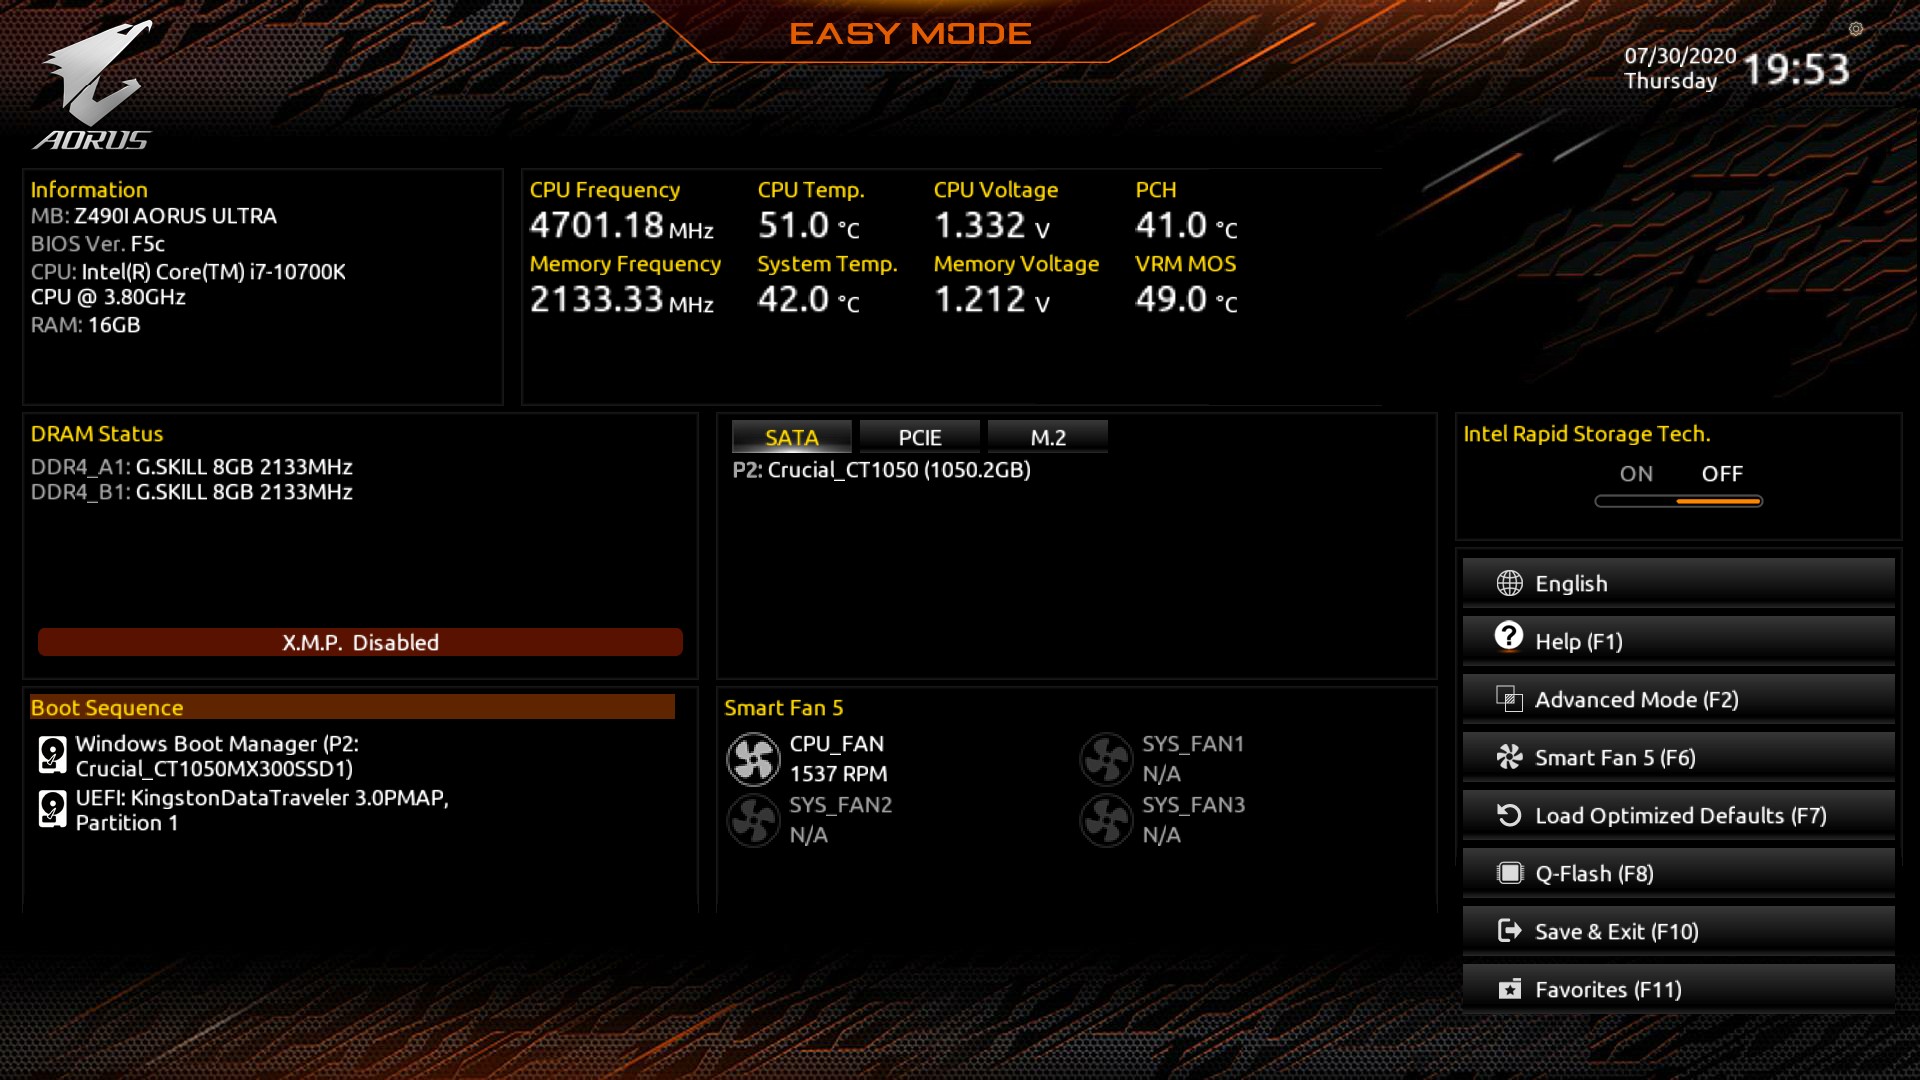
Upon first boot and entering the BIOS, the Easy Mode displays an essential list of information including the version of the firmware being used, the installed processor, as well as information pertaining to the CPU frequency, temperatures and basic voltages. To the bottom left-hand corner, users can change the boot sequence order, while the right-hand side displays a list of menus which can be accessed by pressing the corresponding key.
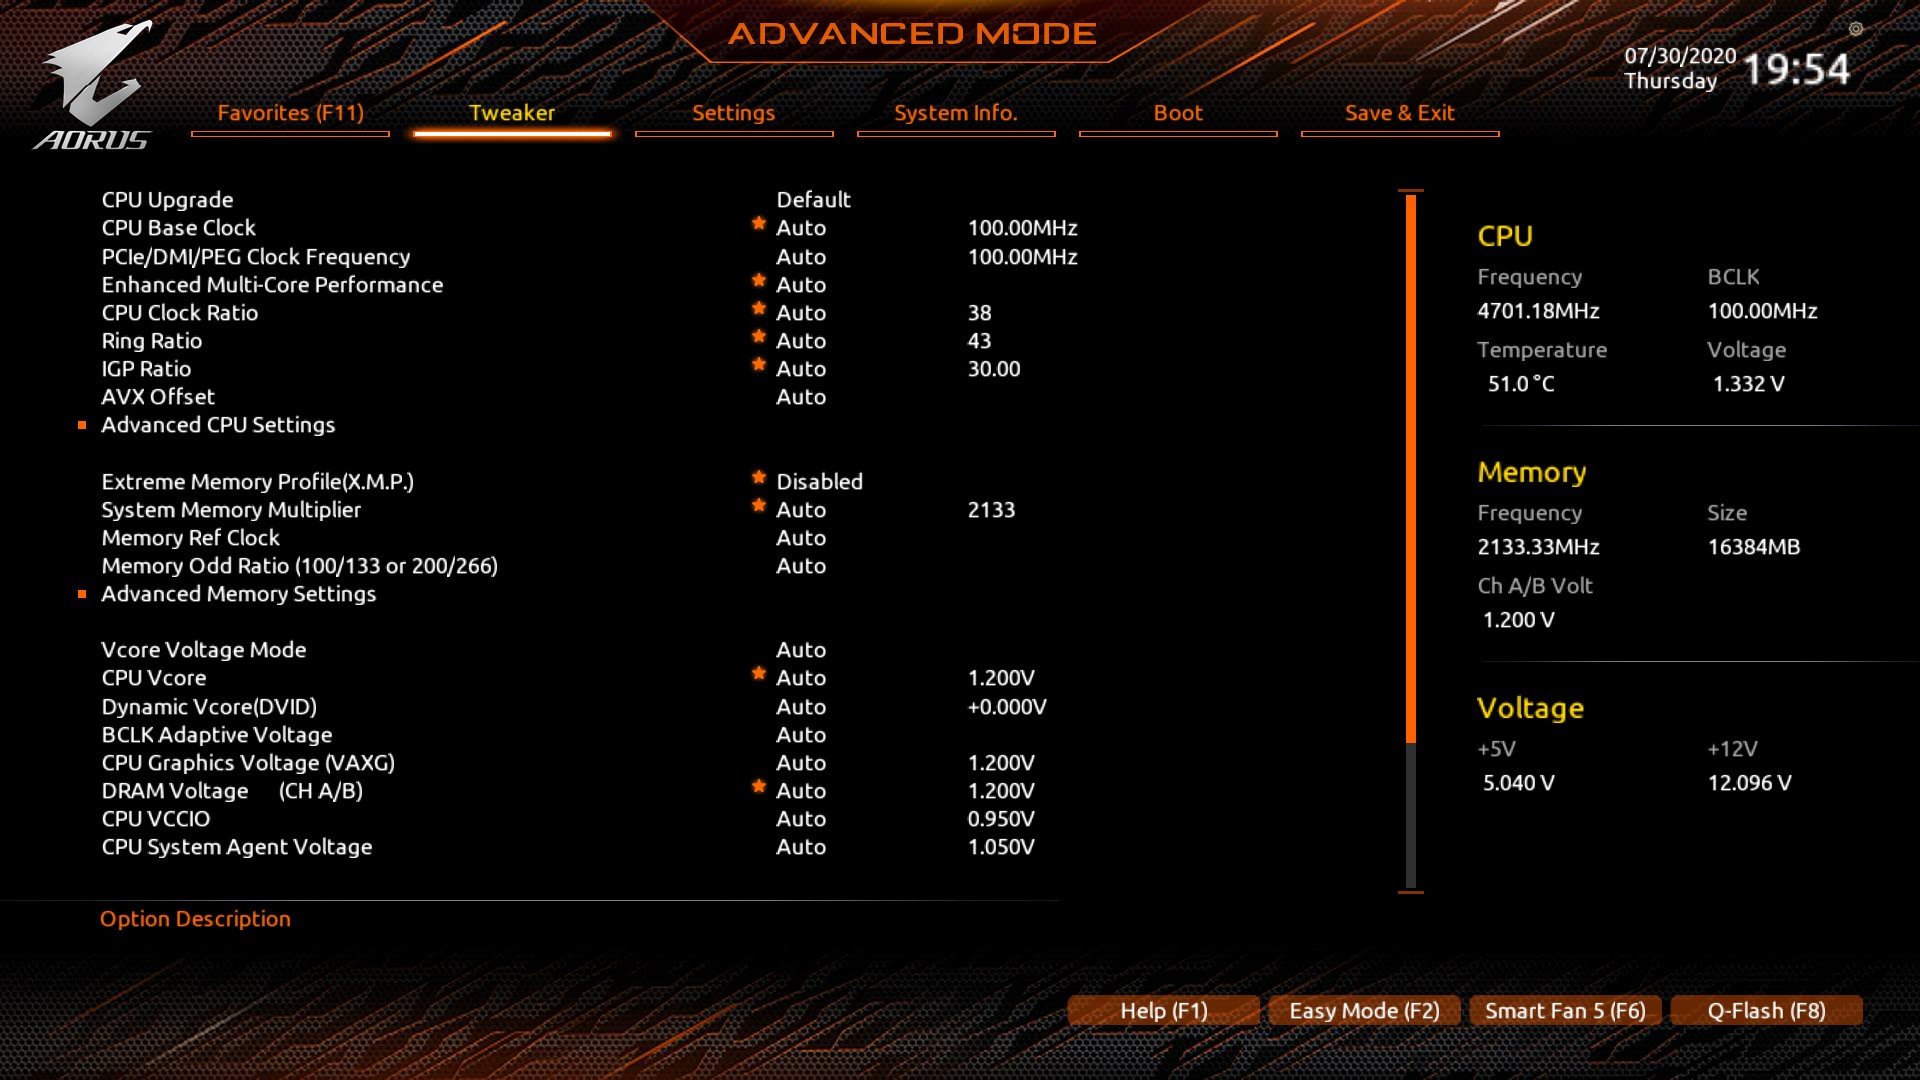
In the advanced mode, users can tweak and perform overclocks on both the CPU and memory, as well as access more intricate parts including GIGABYTE's Smart Fan 5 utility and chipset related options. There's plenty of options for users to get to grips with including an extensive list of CPU and memory frequency, memory latency and voltage settings. Other options included within the firmware also stretch to integrated graphics frequency, as well as settings for changing the ring and base-clock frequencies. For enthusiasts, GIGABYTE includes power-related options for Intel's VF Curve and power profiles, as well as settings to change the power delivery and load-line calibration settings for tighter or slacker VDroop control.


The GIGABYTE Aorus firmware in itself is easy to navigate and use, although the menus are quite stacked and somewhat cramped. This can be intimidating for users without much in the way of organization of the Tweaker menu and opts to just list all of the settings, as opposed to placing them in individual sections for CPU, memory and voltages. GIGABYTE is consistent with its firmware and it is responsive and intuitive.
GIGABYTE Z490I Aorus Ultra Software
All of GIGABYTE's software package revolves around the Aorus App Center which adds as a central hub for all of its software offerings. It also provides access to a multitude of Windows-related settings including power options, network settings, and the integrated Windows Firewall.
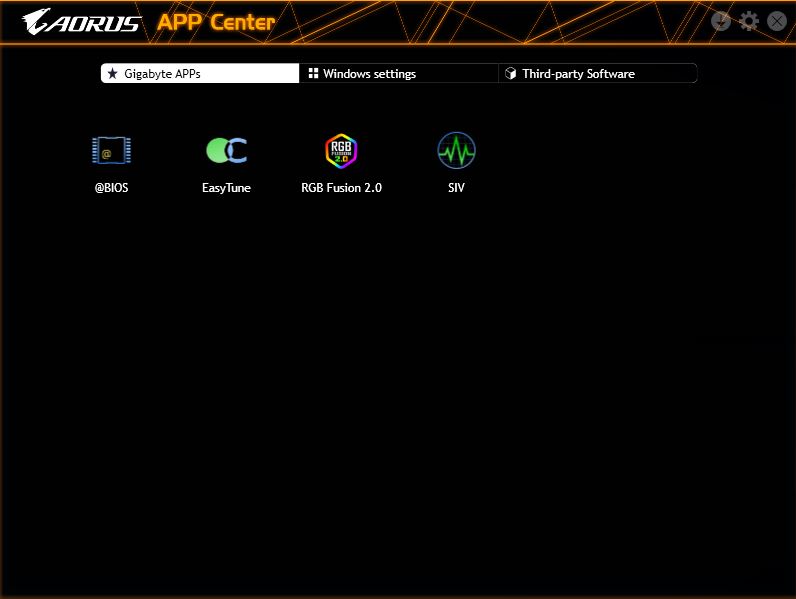
Some of the most notable inclusions with the Z490I Aorus Ultra include the @BIOS firmware updating application, the EasyTune software, GIGABYTE's RGB Fusion 2.0, and the System Information Viewer or SIV software.

The EasyTune software allows users to perform in operating system overclocks, with plenty of options for changing the CPU frequency, base clock frequency, and related voltage settings. Users can opt to overclock the CPU on a per-core basis in 100 MHz increments, or sync all-cores for more hardened and heat-intensive overclocks. There are also options to change the memory frequency on the fly as well as DDR4 primary latency timings, as well as alter the CPU VCore current protection for users looking to perform big overclocks, although with Comet Lake running hot even at stock settings due to great turbo clock speeds, this is more for the enthusiasts with beefier cooling setups.
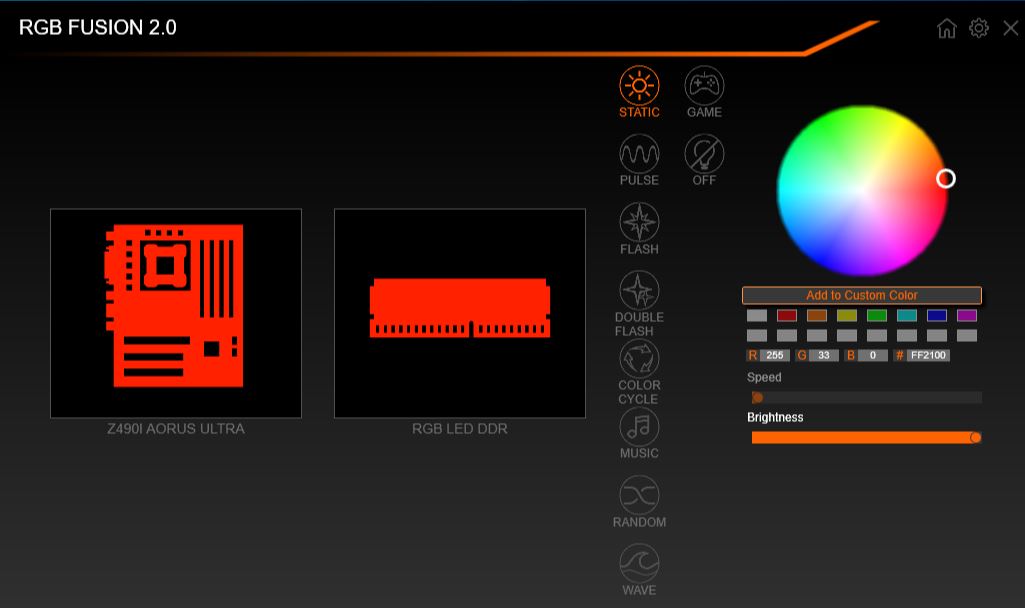
GIGABYTE's software omits any form of audio software, although users can download the Realtek Audio Center direct from the Microsoft store. Users can alter and create disco-inspired light shows with the integrated RGB Fusion 2.0 software, as well as customize additional RGB LED strips which can be purchased separately. Users can even sync compatible RGB memory with the integrated LEDs for a more uniformed look.


Overall the GIGABYTE software package is basic, but it provides extra user experience and offers customization of styling, as well as overclocking. Despite advancements in overclocking software, we still recommend users do all the CPU and memory overclocking within the BIOS.


21 Comments
View All Comments
realbabilu - Tuesday, August 4, 2020 - link
Max fan size?Mr Perfect - Tuesday, August 4, 2020 - link
So the MSI trades two USB 3 ports for a weedy little VRM fan that doesn't beat a passively cooled board? A poor trade.nerd1 - Tuesday, August 4, 2020 - link
Single GBE for $270 board?shabby - Tuesday, August 4, 2020 - link
Less is more...drexnx - Tuesday, August 4, 2020 - link
no space on the PCB or back panel for moree1jones - Tuesday, August 4, 2020 - link
Don't they both have a single 2.5G connector?Luminar - Tuesday, August 4, 2020 - link
I would only buy with 10G ethernet.firewrath9 - Wednesday, August 5, 2020 - link
I would only buy with 400gbe infinibandAdditionalPylons - Wednesday, August 5, 2020 - link
At least 2.5 GbE is finally becoming standard with this generation of motherboards!Personally, on bigger boards I don't mind the integrated NIC because I can easily add a 25 GbE SFP28 PCIe card for less than $100 used (or 10 GbE SFP+ for ~$30).
On smaller boards like mITX however, with only one PCIe slot available, I would also prefer 10 GbE integrated.
Of course these are personal preferences. I don't see 10GbE ever going mainstream because the need simply isn't there for the vast majority of people. Even most tech geeks at AT and similar sites are still fine with 1 GbE (or slower wifi). Also, because we who want faster don't mind different cables and connectors (SFP+) and therefore can buy cheap used enterprise gear, there is simply a very small market left.
On a related note, while switches are getting cheaper (e.g. Netgear MS510TX, QNAP QSW-308-1C / QSW-1105T, Mikrotik CRS305 etc.) it would be nice to see some cheaper 5/10G external USB NIC options to cater to the laptop crowd. ($79 5GbE QNAP QNA-UC5G1T is getting close, but 10G options are all $150+.)
henkhilti - Tuesday, August 4, 2020 - link
Identical vrm components, both have proper vrm heatsinks.One vrm runs hotter and that board consumes more power (and has hotter cpu).
Better check what the real Vcore voltage is during load with a multimeter on the back of the cpu socket and you will know why!!!!
Always check real voltages with a multimeter when overclocking. Use Loadline calibration settings in bios (with more Vdroop) to increase stability (during transients).
If both boards run identical Vcore during load, power consumption and cpu heat will be very similar.