BIOS and Software Setup
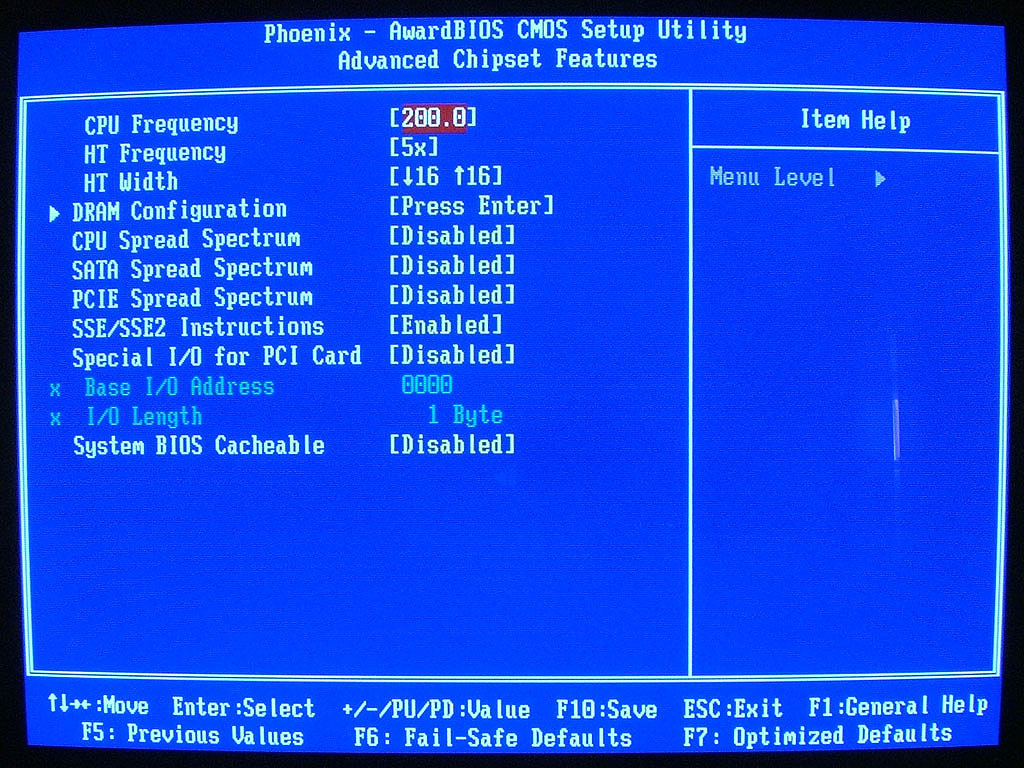
Note: Shuttle sent us several updated BIOS versions. The first enabled 1T command rates, but then the timings were locked at 2-3-3-5 (regardless of what you specified in the BIOS). They sent us an updated version, FN25S904.BIN, which allowed proper adjustment of the memory timings. 1T command rates have improved scores noticeably in the past, so we would recommend that anyone interested in the SN25P should make sure to get the latest BIOS from Shuttle. At present, they are up to BIOS revision FN25S906, which improves overclocking stability, but we only received that after this article was written.With the components all installed, the system is now ready to be powered up. We start by checking out the BIOS screens and features. The standard and advanced BIOS screens are pretty standard for a Phoenix/Award BIOS. Moving on to the advanced chipset features, we start to encounter some of the more interesting options.
 |
 |
| Click on images to enlarge. | |
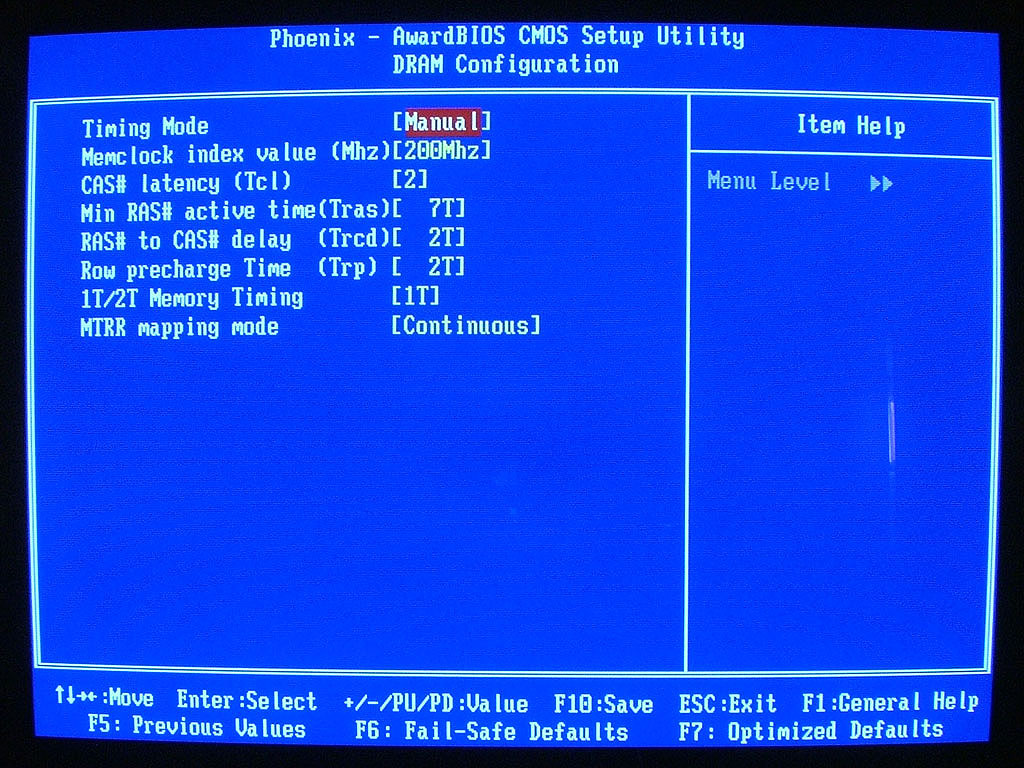
Here, we find the controls for the CPU bus speed as well as the HyperTransport bus. A submenu contains the DRAM Timings, which are sometimes necessary in order to tune your system for optimal performance. In our system, the RAM (Samsung TCCD 2-2-2-5) was not detected properly and defaulted to 2.5-4-2-8 timings. We set it to 2-2-2-7 before continuing. (Wes' memory tests have shown a tRAS of 7 to produce the highest performance on nForce4 chipsets.)
 |
 |
| Click on images to enlarge. | |
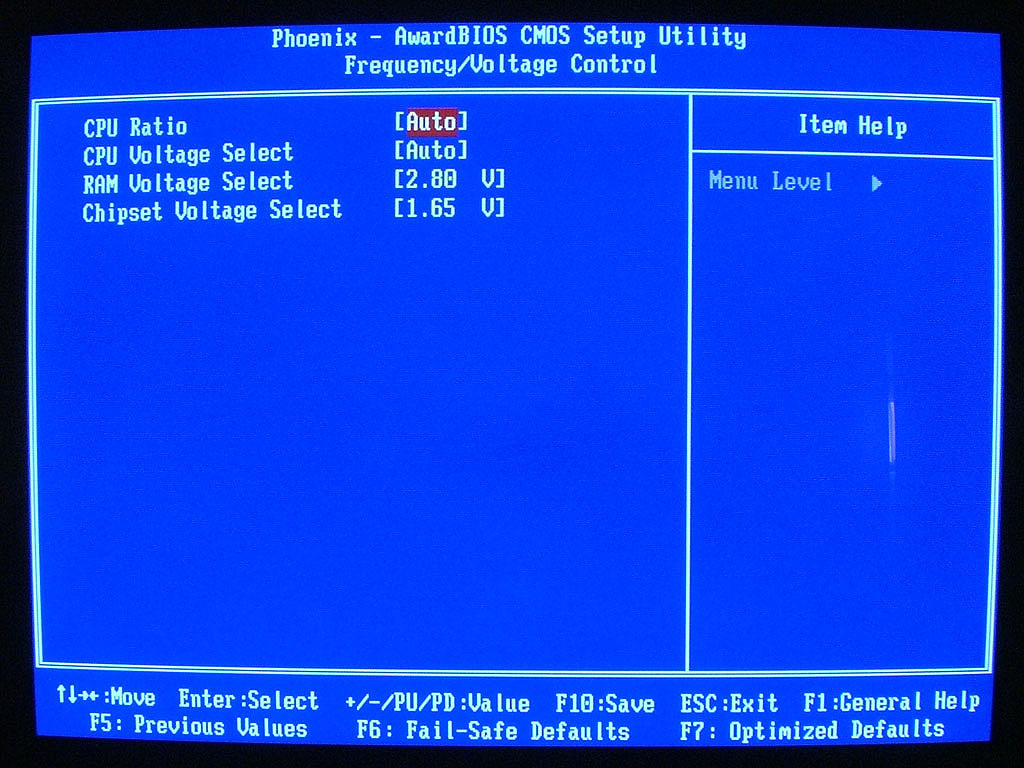
The Frequency/Voltage screen will also be of interest to enthusiasts. The CPU bus speed can be set from 200 to 250, although even with the tested BIOS revision, we were unable to make use of most of the available settings. Serious overclockers would like the ability to run the bus at least to 300 MHz. However, before such a feature becomes meaningful, we'll need to be able to actually reach the high bus speeds. Shuttle has informed us that they are working on an updated BIOS that will allow for higher bus speeds, hopefully up to 300 MHz, but our tested version had difficulties as you'll see in our overclocking results.
We have included pictures of the remaining BIOS screens just to be complete, and those interested in seeing the other options should download the full image set.
After the BIOS is set up the way that we like it, we move on to installing Windows XP. There isn't much to talk about until the OS installation is finished - at which point, we need to install the chipset and audio drivers. Shuttle includes a CD for this purpose, along with utilities like WinFlash and Adobe Acrobat Reader 6. A second CD includes a copy of Trend Micro PC-cillin 2004 Internet Security - an anti-virus and firewall program - along with Muvee autoProducer 3.1 CE, a video editing package. We didn't really pay much attention to the Muvee product, but Trend Micro is a well-known anti-virus firm, and a free copy of their software is a decent extra. It is a full year subscription, which is even better, as opposed to a 30 or 90 day trial version.
Worth noting is that the audio drivers by default do not run in hardware accelerated mode. In order to activate this, open the VIA Envy control panel, click the "Advanced" tab, and check the box for "Sound Effects/3D Gaming Support". It will be necessary to reboot the system for this to take affect. If you fail to do this, sound in several games loses some of the advanced 3D effects. 3DMark03/05 will also disable the audio acceleration tests and report the hardware as being capable of supporting 0 hardware accelerated 3D streams. Once you've enabled the feature, you will get the proper sound support, and the drivers will report the ability to accelerate 64 3D audio streams.
That takes care of the system setup. After installing our standard benchmarking software, we're ready to see how the system actually performs in day-to-day use.


30 Comments
View All Comments
CrystalBay - Wednesday, March 9, 2005 - link
Nice review, 375.00 is that Shuttle's retail price ?I like the PSU is there any rating on the 12v line.
JarredWalton - Wednesday, March 9, 2005 - link
8 - I didn't have any difficulty installing a DVD drive into the SN25P. The "button" has a fairly large range of movement, which allows it to work well. Also, the screw-less design of the CD worked well for me.As far as the graphs go, my intention is to actually go back and add in figures for the SN95G5 and Soltek 3901-300 Pro when I finish testing them, so in the future the charts will hopefully become more meaningful. Having only run one set of benchmarks for this particular configuration made the benchmarks somewhat superfluous for the time being. :|
Gioron - Wednesday, March 9, 2005 - link
One thing that I noticed was that all the noise and heat graphs were on their own seperate scale. This might not be as big a deal when there are multiple cases on the chart, but when there is only one it makes it impossible to just run your eye down the chart and see what the range is. I'd really recommend picking the largest scale and sticking with it for all the charts (and preferably, do the same when there is more than one case on those graphs).Other than that minor layout glitch, a fairly good review. One thing I was wondering, however, was how well the cover over the CD drive works. I know my G5 series case takes a lot of tweaking to get the CD drive positioned just right so that the button will actually open the drive, have they improved that in the P series chasis?
OrSin - Wednesday, March 9, 2005 - link
Not impressed at all.Case too big, and no PCI slot is huge turn off for me.
I think alot SSF users use thier system as HTPC and this system just will not work. I would perfer a wider case, than a taller one. And no PCI slot means no TV tuner or FTA cards.
Maybe I will wait for the one with the ATI motherboard, or the Biostar or just get a HTPC case and get a real motherboard in it.
Oh yeah $400 is little steap even for SFF cases.
JarredWalton - Wednesday, March 9, 2005 - link
#5 - blame my camera. It's definitely NOT a high-end model. Most of the external shots were provided by Shuttle, so I used those as a better quality image. The front panel *does* have a speckled look to it. Maybe I'll see about upgrading to a better camera in the future. Right now, the originals are taken at 2048x1536 (the max of my 3 MP Fuji camera), but after cropping and misc. cleanup I resized them to a more manageable format.IceWindius - Wednesday, March 9, 2005 - link
Ok, why do alot of these picture in their large format look very grainy like it was done in 640x480 mode?IceWindius - Wednesday, March 9, 2005 - link
Well see how well this machine does in the reliable department as many people complained about the SN95g's issues.That and I want to see Creative make a PCI-E soundcard as well as onboard sucks period.
deathwalker - Tuesday, March 8, 2005 - link
#1...for the most part i agree that overclocking wont be a issue with a lot of SFF buyers. One point of concern for me would be the absence of a PCI slot for standard PCI periphrials..such as a TV tuner card..which i have in my system and use frequently.This does look like an attractive device though with a little extra room than most SFF's and a Power Supply with some performance margin in it.
pbrain - Tuesday, March 8, 2005 - link
Fantastic review. Now, where and when are they going be available?!segagenesis - Tuesday, March 8, 2005 - link
And I thought my SN41G2 was expensive at $300 when it was new. Ouch!Good review, however. I dont think overclocking is a major selling point for a SFF when most people want one for noise/size/convenience.